The Keurig K-Duo is a versatile coffee maker that lets you brew a single cup with K-Cup pods or a carafe with ground coffee. Its user-friendly design makes it a favorite among coffee lovers.
Why Descaling Matters?
To maintain your Keurig K-Duo’s performance and ensure consistently delicious coffee, regular descaling is essential. This guide will walk you through each step of the descaling process, helping you eliminate mineral buildup and enjoy a freshly brewed cup of coffee with ease. Let’s begin!
💡 This descaling instruction is applicable to all models in the K-Duo™ Series: K-Duo™, K-Duo™ Essentials™, K-Duo™ Special Edition, K-Duo Plus™.
What are the signs that Keurig Duo Coffee Maker needs descaling?
Signs that your Keurig Duo Coffee Maker may need descaling include:
- Slow Brewing: If your coffee maker is taking longer than usual to brew a cup or carafe of coffee, it could be due to mineral buildup in the internal components.
- Reduced Water Flow: A noticeable decrease in the water flow during brewing can indicate scale deposits in the water lines and internal tubing.
- Strange Tastes: If your coffee or beverages taste unusual, such as having a metallic or bitter flavor, it may be a sign that mineral deposits are affecting the water quality.
- Incomplete Brewing: If the brewing process stops prematurely or doesn’t fill the cup or carafe to the desired level, it might be due to clogs caused by mineral buildup.
- Error Messages: Some Keurig models may display error messages related to scaling or brewing issues.
Regular descaling can help address these issues and keep your Keurig Duo Coffee Maker performing at its best.
What You’ll Need:
- Keurig Descaling Solution
- A large ceramic mug
- Access to a sink
- Fresh water
Step 1: Power Off and Prepare
- Begin by powering off your Keurig Duo and allowing it to cool down.
- Empty the water reservoir completely.
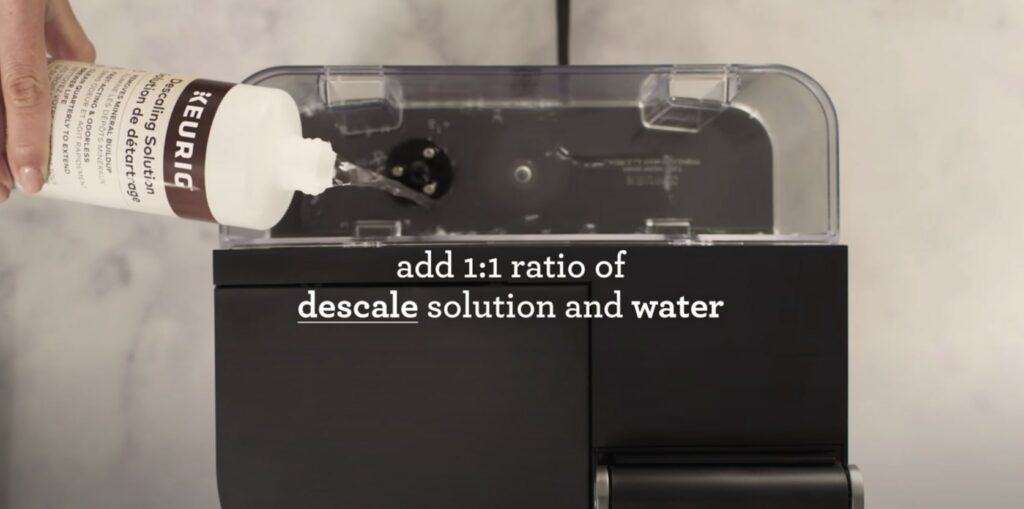
- Pour the entire bottle of Keurig Descaling Solution into the water reservoir.
- Fill the same bottle with water and add it to the reservoir. No K-Cup Pods or coffee grounds are needed at this stage.
Step 2: Single Cup Rinse
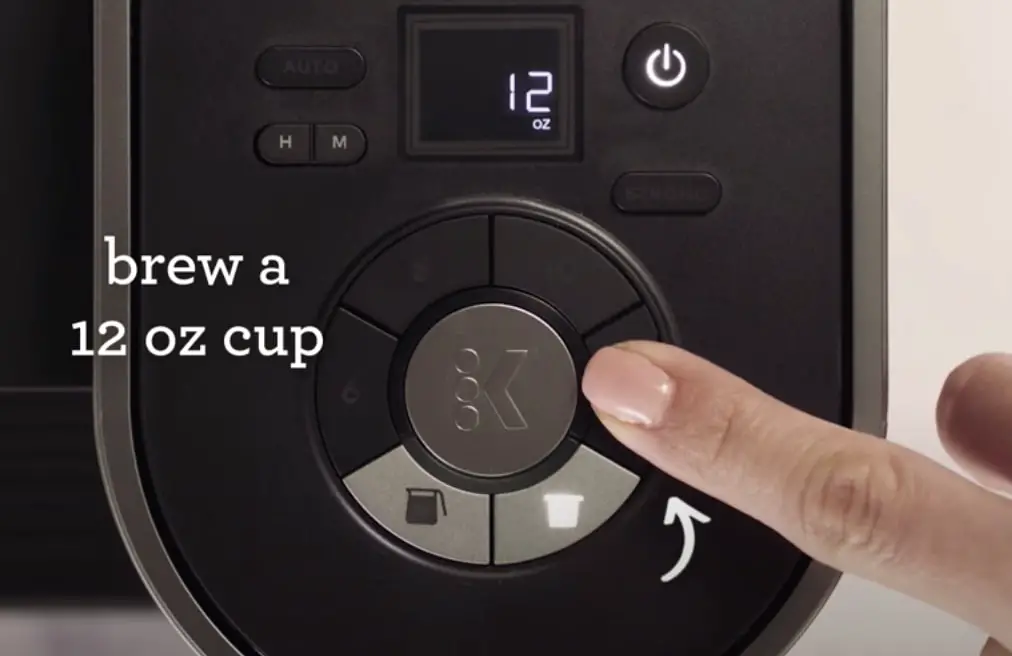
- Place a large mug on the drip tray and activate the single cup side by pressing the OZ/POD button.
- Initiate a single cup rinse brew by pressing the 12 oz button. After brewing, pour the hot liquid down the sink.
Step 3: Carafe Rinse
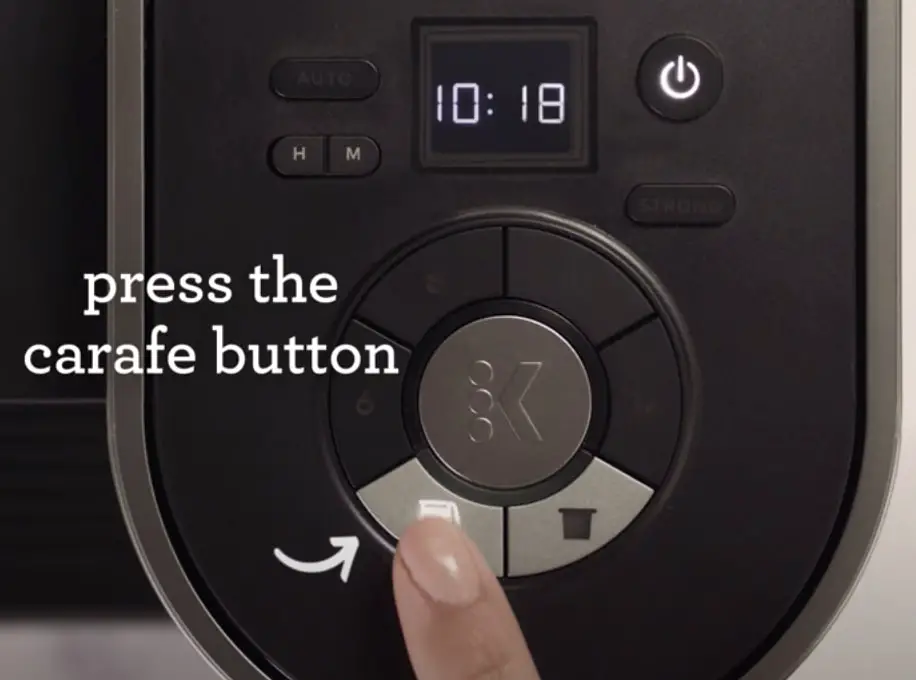
- Switch to the carafe side by ensuring the carafe is on the heating plate.
- Press the CUPS/CARAFE button and select the 12 setting to start a carafe rinse brew.
- Once the carafe rinse brew is complete, empty the carafe into the sink. Be sure to hold down the CUPS/CARAFE button to turn off the heating plate.
Step 4: Internal Tank Soak
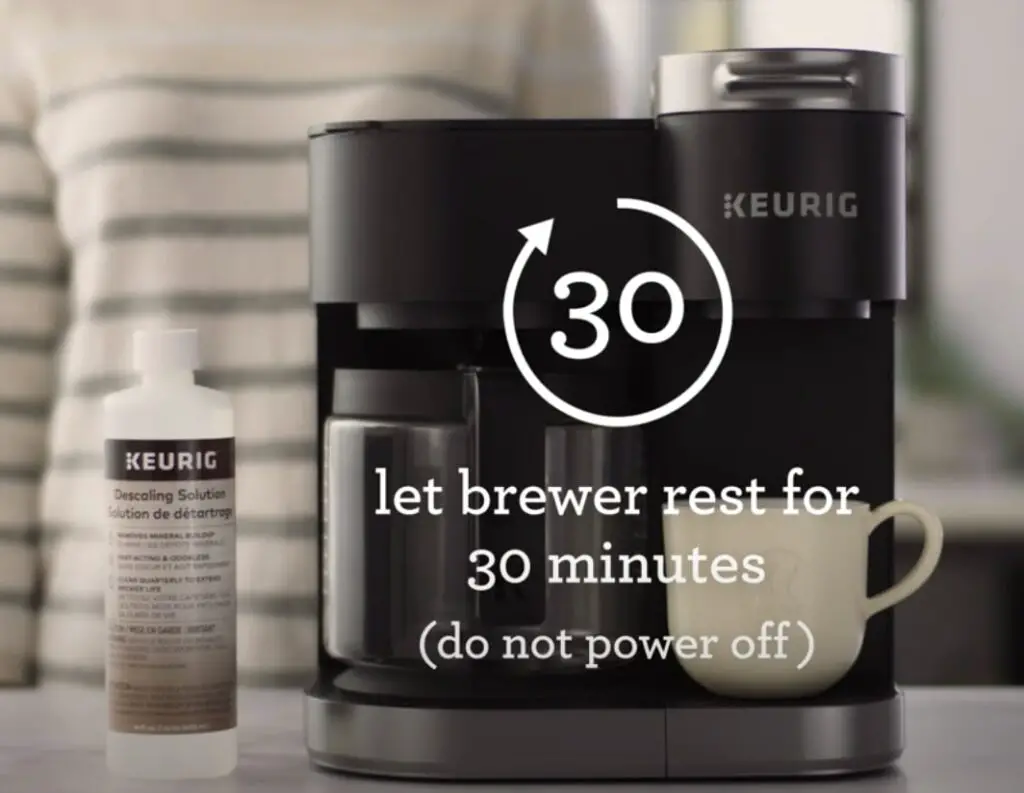
- Allow your Keurig Duo to stand for at least 30 minutes to let the descaling solution work its magic.
- After 20 minutes, check for any residual solution in the water reservoir and discard it. Rinse the reservoir thoroughly.
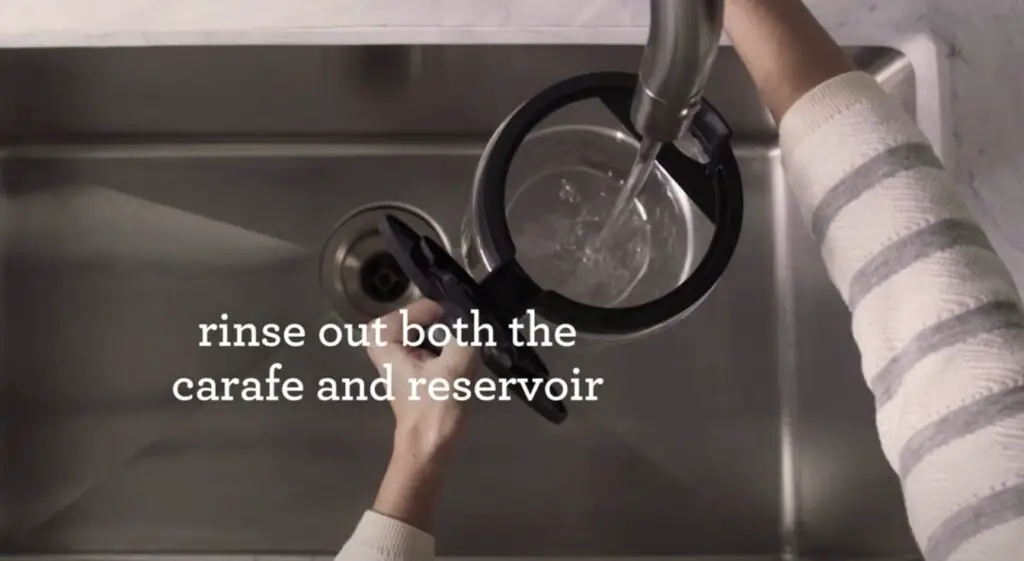
Step 5: Fresh Water Rinse
- Fill the water reservoir to the MAX fill line with fresh water to rinse out any remaining solution and impurities.
Step 6: Carafe Rinse (Four Times)
- Place the carafe back on the heating plate.
- Activate the carafe side by pressing the CUPS/CARAFE button and select the 12 setting for a carafe water brew.
- After each brew, hold down the CUPS/CARAFE button to turn off the heating plate and pour the hot liquid into the sink. Repeat this process three more times for a total of four carafe rinses.
Step 7: Single Cup Rinse (Four Times)
- Refill the water reservoir and grab a mug.
- Activate the single cup side by pressing OZ/POD and select the 12 setting for a single cup water brew.
- After each 12oz brew, your Keurig Duo should rinse the solution from the single cup side. Repeat this process three more times for a total of four single cup rinses.
Common Issues After Descaling K-Duo
Descaling your K-Duo coffee maker is essential for maintaining its performance and ensuring a great cup of coffee. However, you may encounter some common issues after descaling. Here’s how to troubleshoot them:
1. Brewing Problems:
Issue: Your K-Duo may not brew properly after descaling.
Solution: Turn off and unplug the brewer. Discard any remaining Descaling Solution from the reservoir. Rinse the reservoir thoroughly and refill it with fresh water. Plug the brewer back in, power it on, and repeat the fresh water rinse cycle as described in the descaling instructions. This should restore normal brewing.
2. Foam Dispensing:
Issue: During descaling, you might notice foam coming out of the brewer.
Solution: Foam during descaling is normal, especially if your brewer was heavily scaled. It’s usually not a cause for concern. However, if you encounter additional issues, follow the steps mentioned above for brewing problems.
3. Persistent Issues:
Issue: Despite descaling and following troubleshooting steps, your brewer still has problems.
Solution: If problems persist, unplug your brewer for at least 30 minutes before attempting the fresh water rinse again. Sometimes, giving your brewer a break can help resolve persistent issues.
4. Descale Light Won’t Turn Off:
Issue: The descale light on your K-Duo remains illuminated even after descaling.
Solution: If the descale light won’t turn off, it may indicate that the descaling process needs to be repeated. Follow the descaling instructions once more to ensure that all mineral buildup is removed. After completing the descaling process again, unplug the brewer, wait for a few minutes, and then plug it back in. The descale light should reset, indicating that your brewer is ready for regular use.
5. Keurig K-Duo Not Pumping Water:
Issue: Your K-Duo is not pumping water, preventing it from brewing.
Solution: If your K-Duo is not pumping water, check the following:
- Ensure that the water reservoir is properly seated.
- Make sure the reservoir is filled with enough water.
- Check for any clogs or blockages in the water line and clean as needed.
- Confirm that the brewer is correctly plugged in and powered on.
- Restart the brewer by turning it off, unplugging it, waiting for a few minutes, and then plugging it back in. Power it on and attempt to brew again.
By addressing these common issues and following the recommended steps, you can ensure that your K-Duo coffee maker functions optimally after descaling, providing you with delicious coffee every time.
FAQs on Cleaning K-duo
Can I use vinegar for descaling, or do I need a specific descaling solution?
You can use white vinegar as an alternative to a specific descaling solution. While descaling solutions are designed for the task and may be more effective, vinegar can work well too. Just make sure to use pure white vinegar, not diluted, to effectively remove mineral buildup.
Are there any alternative methods for descaling besides using a descaling solution?
Yes, apart from descaling solutions and vinegar, you can also use citric acid to descale your Keurig Duo Coffee Maker. Citric acid is a natural option and can be as effective as other solutions.
Can I descale the single-serve and carafe sides separately?
Yes, you can descale the single-serve and carafe sides of your Keurig Duo Coffee Maker separately. Follow the descaling process for each side to ensure both are free from mineral buildup.
Is there a specific water temperature or type I should use for descaling?
When descaling your Keurig Duo, it’s best to use room temperature or cold water. Avoid using hot water as it could damage the machine during the descaling process. As for the type of water, regular tap water is suitable for descaling.
Can descaling solve issues like slow brewing or strange tastes in my coffee?
Yes, descaling can often resolve issues like slow brewing and strange tastes in your coffee. Mineral buildup inside the machine can affect water flow and the taste of your coffee. Descaling helps remove these deposits, improving performance and taste.
Are there any maintenance tips to prevent the need for frequent descaling?
To reduce the frequency of descaling, use filtered water instead of tap water, as it contains fewer minerals. Regularly clean the removable parts of your Keurig Duo, such as the water reservoir and drip tray. Additionally, always empty the water reservoir when not in use to prevent standing water from promoting mineral buildup.
Final Thoughts on Descaling Keurig Duo
Regularly descaling and cleaning your Keurig Duo coffee maker ensures it stays in top shape, guaranteeing delicious coffee every time. With this comprehensive guide and a few simple materials, you can easily conquer mineral buildup and enjoy your favorite brews hassle-free. Here’s to great coffee!
💡 More Descaling guides on Different Keurig Modes:
👉 How to descale keurig slim?
👉 How to descale keurig slim with vinegar?
👉 How to descale keurig mini?
👉 How to descale keurig supreme?
👉 How to descale keurig supreme with vinegar?
👉 How to descale keurig express & K-iced?
👉 How to descale keurig elite?