Are you frustrated with your Keurig Slim’s slower and less efficient coffee brewing? It might be time to descale your machine. Descaling involves removing mineral deposits that gradually build up from the water used for brewing coffee. These deposits can impact coffee taste, quality, and your machine’s overall performance.
Fortunately, descaling your Keurig Slim is a straightforward process that can be completed in a few simple steps. In today’s article, I’ll explain how to descale your Keurig using a descaling solution and provide alternative kitchen ingredients for descaling when you don’t have a descaling solution on hand.
Why Your Keurig Slim Needs Descaling?
The Impact on Brewing Process
Mineral buildup in your Keurig Slim can significantly impact its brewing process and lead to clogs and malfunctions. As minerals from the water accumulate within the machine, they can create blockages in the water lines, hindering the smooth flow of water.
This can result in slower brewing times, incomplete or uneven coffee extraction, and even machine malfunctions in severe cases.
Regular descaling helps prevent these issues by effectively removing mineral deposits and keeping your Keurig Slim in optimal working condition.
Effects on Taste and Quality
Mineral buildup can have a noticeable effect on the taste and quality of the coffee and tea brewed by your Keurig Slim. As the minerals alter the composition of the water used for brewing, it can result in off-flavors and a less-than-desirable coffee or tea experience.
Descaling helps maintain the purity of the water, ensuring that your beverages taste fresh, consistent, and as intended, making your coffee or tea break a more enjoyable ritual.
How to Descale Keurig Slim with Descaling Solution? Step by Step Guide
Materials Needed for Descaling
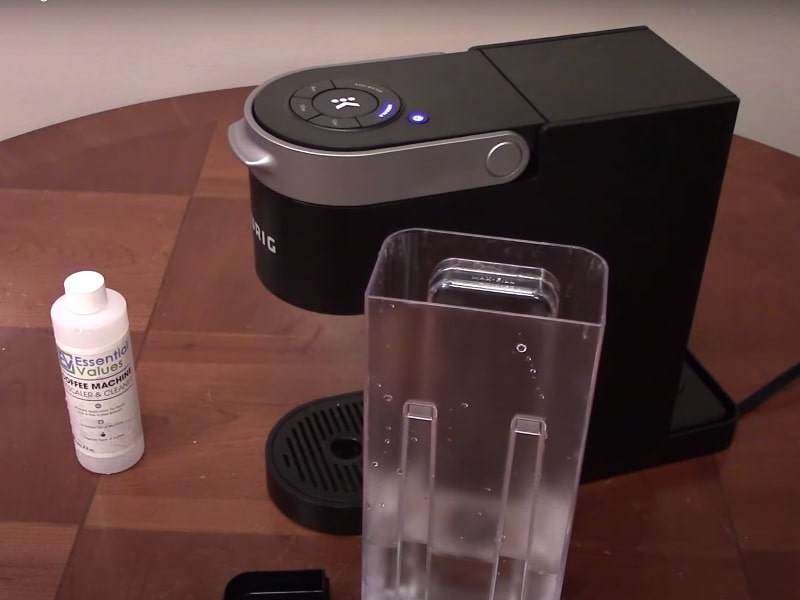
Before you start descaling your Keurig Slim, gather the following materials:
- Keurig descaling solution
- Water
- Large mug
- Clean cloth
Next, follow these steps to descale your Keurig Slim using a descaling solution.
Preparation
- Turn off your Keurig Slim and unplug it from the power source.
- Remove any remaining water from the water reservoir and discard it.
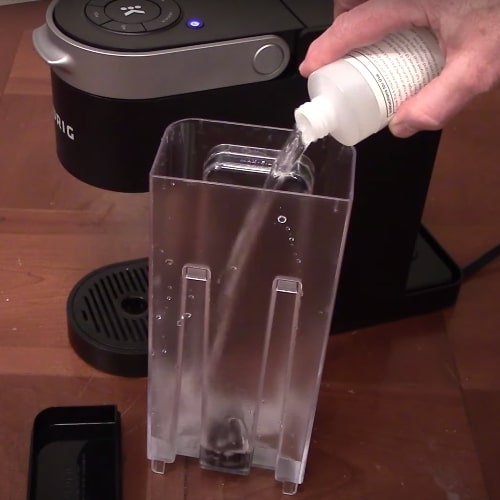
- Mix the descaling solution and water in a 1:1 ratio.
- Pour the mixture into the water reservoir.
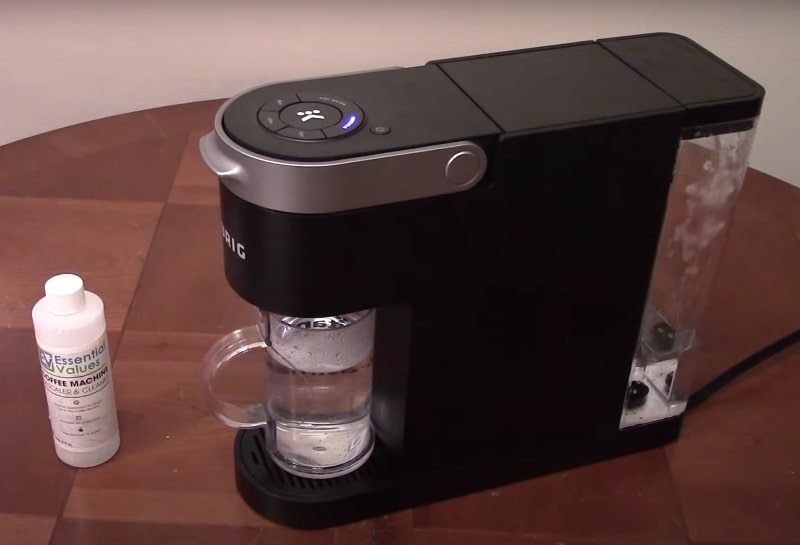
- Place a large mug under the brewer.
Descaling Process
- Press and hold the 8 oz and 12 oz buttons together for 3 seconds to start the descale rinse. The “descale” light will turn solid.
- The brew button will start flashing. Press it to initiate the descale rinse.
- After the cycle finishes, empty the mug and put it back under the brewer.
- Repeat the brew process until the “add water” light begins flashing.
Cleanse
- Rinse the water reservoir with clean water and refill it.
- Press the brew button to start the descale cleanse.
- Repeat the brew process until all lights on the Keurig Slim turn off.
- The Keurig Slim will now exit descale mode and be ready for use.
By following these steps, you can keep your Keurig Slim functioning properly and enjoy delicious coffee every time.
How to descale Keurig without solution?
If you don’t have a Keurig descaling solution on hand, there are a few other methods you can use to descale your Keurig Slim.
Method 1: Vinegar
Vinegar is a popular alternative to descaling solution. Here’s how to use it:
- Empty the water tank and remove any K-cups.
- Fill the water tank with equal parts water and white vinegar.
- Run a brew cycle without a K-cup until the water tank is empty.
- Rinse the water tank thoroughly with fresh water and run several brew cycles with fresh water until there is no more vinegar smell.
👉 Know more details: How to descale keurig slim with vinegar?
Method 2: Lemon Juice
Lemon juice is another acidic alternative to descaling solution. Follow these steps:
- Squeeze the juice of one lemon into the water tank.
- Add water to the tank until it is full.
- Run a brew cycle without a K-cup until the water tank is empty.
- Rinse the water tank thoroughly with fresh water and run several brew cycles with fresh water until there is no more lemon smell.
Method 3: Baking Soda
Baking soda is a gentle abrasive that can help remove mineral buildup. Here’s how to use it:
- Mix 1/4 cup of baking soda with 1/4 cup of water to make a paste.
- Apply the paste to the inside of the water tank and let it sit for 15 minutes.
- Scrub the inside of the water tank with a soft brush.
- Rinse the water tank thoroughly with fresh water and run several brew cycles with fresh water until there is no more baking soda residue.
Method 4: Citric Acid
Citric acid is a natural acid that can be used to descale your Keurig. Here’s how to use it:
- Mix 1 tablespoon of citric acid with 1 cup of water.
- Pour the mixture into the water tank.
- Run a brew cycle without a K-cup until the water tank is empty.
- Rinse the water tank thoroughly with fresh water and run several brew cycles with fresh water until there is no more citric acid residue.
5: CLR Method (Caution: Be Sure It’s Safe for Your Keurig Model)
If compatible with your Keurig model, you can use CLR (Calcium, Lime, and Rust Remover). Ensure it’s suitable for your machine and follow safety precautions.
How to Handle Odors After Descaling with Vinegar or Solution?
After descaling your Keurig Slim with vinegar or a commercial descaling solution, you may notice a strong odor that can be unpleasant. Here are some tips to help you handle the odors:
- Rinse thoroughly: After descaling, rinse your Keurig Slim thoroughly with fresh water. This will help remove any remaining vinegar or solution and reduce the odor.
- Use Distilled Water: Consider using distilled water for a few brewing cycles. Distilled water has no minerals, so it won’t leave behind any odors or tastes.
- Clean the exterior: If the odor has transferred to the exterior of the machine, wipe it down with a damp cloth and a mild detergent. Be sure to rinse the cloth thoroughly and wipe the machine again with clean water to remove any soap residue.
- Check for Residue: Inspect the water reservoir, drip tray, and K-Cup holder for any residue or odors. If you detect an odor, wash these components with warm, soapy water and rinse thoroughly.
- Let It Air Out: Leave your Keurig open and unplugged for a while to let it air out. This can help dissipate any lingering odors.
- Wait it out: If the odor persists, don’t worry. It should fade away after a few days of use. In the meantime, you can try opening a window or using an air freshener to help mask the smell.
- Use Odor Absorbers: You can place odor absorbers like baking soda or activated charcoal near your Keurig to help absorb any remaining odors.
By following these tips, you can effectively handle any odors that may occur after descaling your Keurig Slim with vinegar or a commercial descaling solution.
How to Reset Keurig Slim After Descaling?
After descaling your Keurig Slim, reset it to ensure proper functioning.
- Unplug the Keurig: First, unplug your Keurig Slim from the electrical outlet. Safety comes first!
- Wait for a Few Minutes: Allow your Keurig to rest for a few minutes. This brief pause helps reset the machine and ensures that any internal components have settled.
- Plug It Back In: After a few minutes have passed, plug your Keurig Slim back into the electrical outlet.
- Power On: Turn the power back on. Your Keurig Slim should now be reset and ready for use.
Maintaining Your Keurig Slim After Descaling
Regular Cleaning
Even after descaling, it is important to clean your Keurig Slim regularly to prevent the buildup of mineral deposits and other impurities. You can use a damp cloth to wipe down the exterior of the machine, and a toothbrush or a paper clip to clean the needle that punctures the K-Cup.
Filter Replacement
For Keurig Slim models equipped with a water filter, it’s advisable to replace the filter every two months or after brewing 60 cups of coffee, whichever occurs first. This routine maintenance ensures the freshness and cleanliness of your coffee.
Descaling Frequency
The frequency at which you need to descale your Keurig Slim depends on how often you use it and the hardness of your water. If you use your Keurig Slim daily and have hard water, you may need to descale it every three months. If you use it less frequently or have soft water, you may only need to descale it once or twice a year.
Water Quality
The quality of the water you use in your Keurig Slim can also affect its performance and lifespan. If your water is particularly hard or has a lot of impurities, you may want to consider using bottled or filtered water instead.
Common Problems Troubleshooting
After descaling, you may encounter common issues. Continue reading to learn how to address them:
- Slow Brewing or Incomplete Brew Cycle:
- Possible Cause: Mineral buildup may still be affecting the water flow.
- Solution: Repeat the descaling process to ensure all mineral deposits are removed. Rinse thoroughly with fresh water before brewing.
- Unpleasant Taste or Odor in Coffee:
- Possible Cause: Residual descaling solution or vinegar.
- Solution: Run multiple cycles of plain water through your K-Slim to flush out any remaining solution. Clean the water reservoir, drip tray, and K-Cup holder to eliminate odors.
- Descaling Light Stays On:
- Possible Cause: The machine may not have detected the descaling process completion.
- Solution: Double-check that you followed the descaling instructions correctly. Ensure all components are properly reassembled. Perform a power cycle by unplugging and reconnecting your K-Slim. If the issue persists, refer to your user manual for a factory reset option. >>Click here to learn how to reset K-Slim descale light
- Weak Coffee Output:
- Possible Cause: Clogs in the machine’s internal tubes.
- Solution: Run several cycles of plain water through your K-Slim to dislodge any clogs.
- Machine Won’t Turn On:
- Possible Cause: Electrical or power-related issues.
- Solution: Check the power source, ensure the plug is securely connected, and verify that the outlet is functional.
- Leaking Water:
- Possible Cause: Loose or damaged components.
- Solution: Check for any loose parts or damaged seals and replace them if necessary. Ensure all components are properly assembled before use.
- LCD screen is not working:
- Possible Cause: It could be due to a power outage or a loose connection.
- Solution: Check to make sure the machine is properly plugged in and the outlet is working. If the outlet is working, unplug the machine and plug it back in to reset it.
- Inconsistent Brewing Sizes:
- Possible Cause: Scale or debris affecting the brewer’s sensors.
- Solution: Clean the brewer’s needle and K-Cup holder thoroughly.
Remember that regular maintenance and descaling are essential for keeping your Keurig K-Slim in optimal working condition. If you encounter persistent issues that you can’t resolve, don’t hesitate to contact Keurig’s customer support for expert assistance. With proper care, your K-Slim will continue to brew delicious coffee for years to come.
FAQs
What does descale mean on the Keurig Slim coffee maker?
Descaling is the process of removing mineral buildup that accumulates over time from the water used to brew your coffee. This buildup can affect the taste, quality, and performance of your Keurig Slim.
How do I clean the exit needle of my Keurig Slim?
You can do this by carefully removing any visible coffee grounds or debris with a soft brush or a paperclip. Be gentle to avoid damaging the needle.
Is it safe to use descaling solutions with Keurig Slims that have a water filter?
Yes, it is generally safe to use descaling solutions with Keurig Slims that have a water filter.
Can I leave the descaling solution in the Keurig overnight?
It is not recommended to leave the descaling solution in your Keurig overnight. Follow the manufacturer’s instructions for the appropriate amount of time to leave the solution in your machine, usually around 30 minutes. Rinse thoroughly afterward.
What should I do if my Keurig Slim is still slow after descaling?
If your Keurig Slim remains slow after descaling, you may need to repeat the descaling process or check for other issues. Ensure that there are no clogs in the machine.
Can I use a descaling solution if my Keurig Slim is still under warranty?
Yes, you can use a descaling solution if your Keurig Slim is still under warranty. Descaling is a normal maintenance task that is recommended by the manufacturer, and using a descaling solution will not void your warranty as long as you follow the manufacturer’s instructions and use a solution that is recommended for your machine.
A Recap
In short, descaling your Keurig Slim is easy and should be done every three months or when the descale light flashes. Follow the instructions closely for top performance and consistently delicious coffee.
💡 More Descaling guides on Different Keurig Modes:
👉 How to descale keurig mini?
👉 How to descale keurig slim with vinegar?
👉 How to descale keurig duo?
👉 How to descale keurig supreme (plus)?
👉 How to descale keurig supreme (plus) with vinegar?
👉 How to descale keurig express & K-iced?
👉 How to descale keurig elite?
👉 Can you descale a keurig with vinegar?


50 Coffee Facts: For Coffee Lovers
$12.99 (as of May 6, 2025 15:00 GMT +00:00 - More infoProduct prices and availability are accurate as of the date/time indicated and are subject to change. Any price and availability information displayed on [relevant Amazon Site(s), as applicable] at the time of purchase will apply to the purchase of this product.)
Why We Love Coffee: Fun Facts, History, and Culture of the World’s Most Popular Drink (Atlas of Coffee, Coffee Supplies and Techniques)
18% Off
Coffee The Magical Elixir: Facts That Will Astound And Perk You Up


Zulay Kitchen Powerful Milk Frother Wand - Mini Milk Frother Handheld Stainless Steel - Battery Operated Drink Mixer for Coffee, Lattes, Cappuccino, Matcha - Froth Mate Milk Frother Gift - Black
38% Off


Mind Reader 6 Compartment Upright Breakroom Coffee Condiment and Cup Storage Organizer, Black
35% Off


