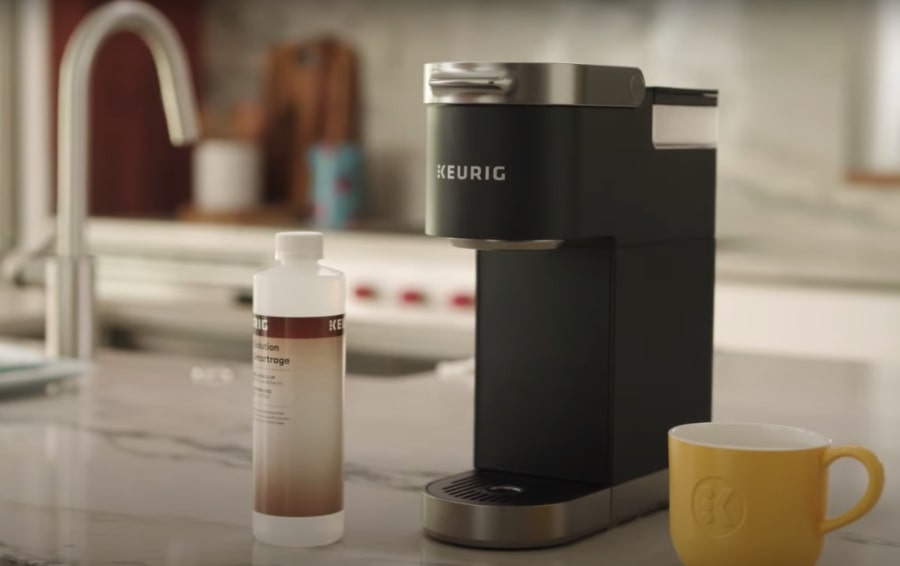
If you’re a Keurig brewer owner, you might notice that your machine is not operating at its best. Descaling is a simple process that can help extend the life of your brewer and restore it to peak performance. We recommend descaling every three to six months with Keurig descaling solution. In this article, we’ll demonstrate how to descale your Keurig Mini brewer using either Keurig descaling solution or white vinegar.
Key Takeaways
- Descaling is a simple process that can help extend the life of your K-Mini brewer and restore it to peak performance.
- Keurig descaling solution is fast-acting and odorless, making it a convenient option for descaling.
- If you prefer an alternative to Keurig descaling solution, you can use white vinegar, but it will take longer.
Materials Needed
To descale your Keurig single-serve, you will need the following items:
- A bottle of Keurig descaling solution
- A large ceramic mug
- Access to a sink
Descaling with Keurig Solution
The process should take about 45 minutes to complete.
Initial Steps
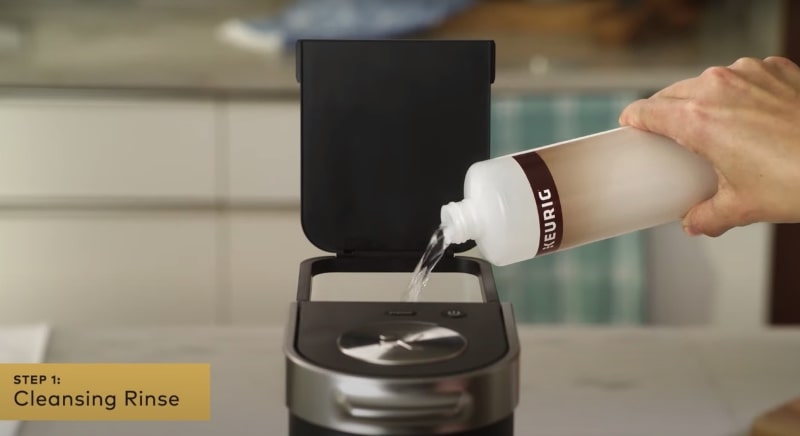
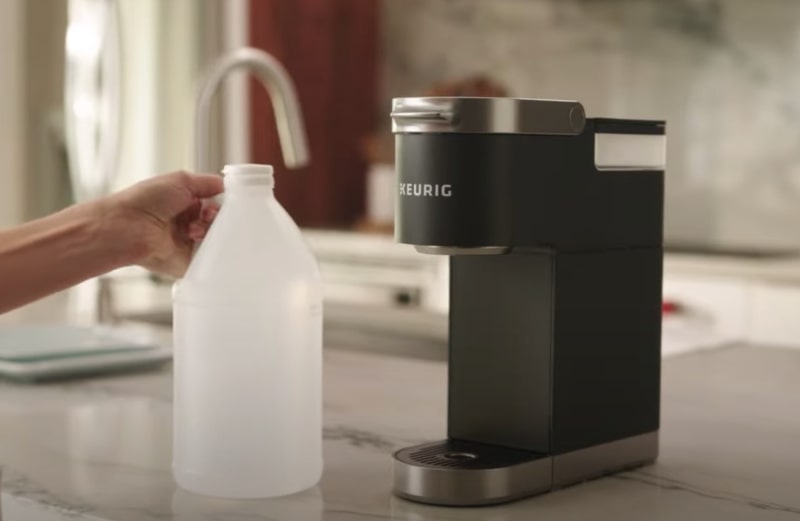
- Start by pouring one-third of the Keurig descaling solution into the water reservoir.
- Fill the water reservoir with fresh water up to the 10-ounce fill level.
- Position a ceramic mug on the drip tray, raise and lower the handle, but refrain from inserting a K-cup pod.
- Once the solution is dispensed, press the brew button, and dispose of the hot contents into the sink.
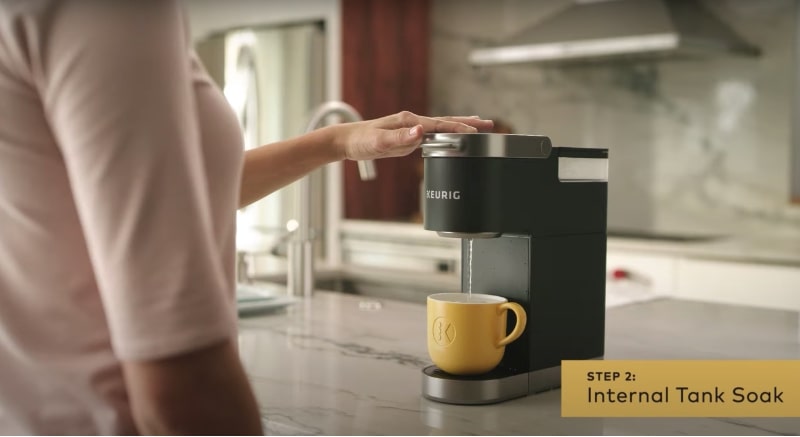
Soaking Period
- To redo the process, wait for the brew indicator light to stabilize and then power off the brewer as it begins to dispense. Leave the brewer undisturbed for at least 30 minutes.
- Press and hold the brew button until the solution starts dispensing, and continue holding until all the solution has been completely dispensed.
- Afterward, dispose of the contents into the sink.
Final Steps
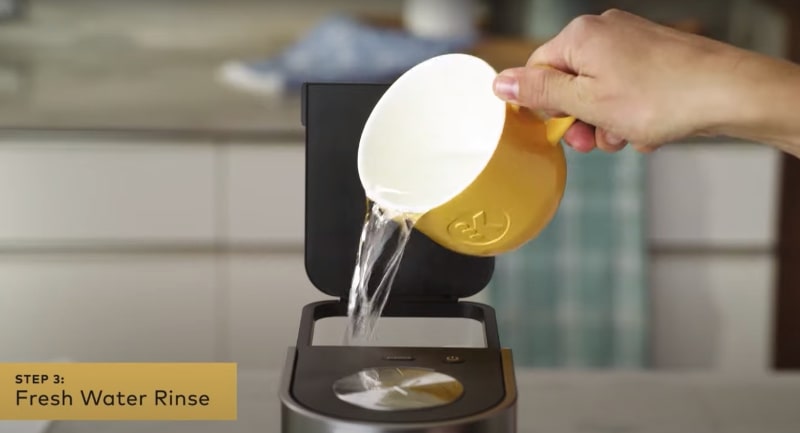
- Now, run a rinsing cycle using 12 ounces of plain, fresh water. Do not include any descaling solution in this step.
- Repeat this rinsing process two more times.
- That’s it! Your brewer is now descaled, and you’re all set to brew your favorite beverages.
Alternative Descaling with White Vinegar
Keurig’s descaling solution does the job quickly, and it won’t leave your brewer with any funky odors. But if you’re up for something different, you can also use plain old white vinegar, which takes a bit more time – around four hours.
Now, when you’re going the vinegar route, here’s what you do: Instead of that Keurig solution, grab yourself a full 24 ounces of pure white vinegar, no need to water it down.
During the internal tank soak, just let your brewer chill for at least four hours. Then, fill ‘er up with fresh water and run that cleansing brew cycle four times or more if you still taste any leftover vinegar vibes.
Step-By-Step Guide
- Prepare Your Brewer: Ensure your Keurig Mini is powered off and unplugged. Remove any used K-Cup pods from the machine.
- Empty the Reservoir: Remove the water reservoir from the brewer and empty any remaining water.
- Pour Vinegar into Reservoir: Fill the entire water reservoir with 24 ounces of pure white vinegar. Do not dilute the vinegar with water; use it in its pure form.
- Replace Reservoir: Place the filled water reservoir back onto the Keurig Mini.
- Start the Descaling Process: Power on the Keurig Mini. Make sure there is no K-Cup pod inserted in the machine. Position a large mug or container (at least 12 ounces in size) on the drip tray.
- Begin Brewing: Start the brewing cycle. The Keurig Mini will pump the vinegar through its internal system. Let the vinegar flow into the mug.
- Discard Vinegar: Once the brewing cycle is complete, pour the vinegar from the mug down the sink.
- Soak the Internal Tank: Turn off the Keurig Mini and let it stand for at least four hours to allow the vinegar to soak and break down mineral deposits inside the internal tank.
- Rinse with Fresh Water: After the soaking period, remove the water reservoir again and rinse it thoroughly with fresh water to remove any residual vinegar smell.
- Refill with Fresh Water: Fill the water reservoir with clean, fresh water up to its maximum fill line.
- Repeat Cleansing Brews: Place the water reservoir back on the machine. Position the same mug or container on the drip tray. Power on the Keurig Mini and run a cleansing brew cycle. Discard the water from the mug.
- Repeat the Process: Repeat the cleansing brew process at least three more times or until there’s no vinegar taste or smell in the water. This helps ensure that all traces of vinegar are completely flushed out of the machine.
Using white vinegar to descale your Keurig brewer is an effective and inexpensive alternative to using Keurig descaling solution. It may take longer, but it’s a great option if you don’t have access to Keurig descaling solution or if you want to save some money.
FAQs
How do I turn off the descale light on my Keurig Mini?
The descale light on your Keurig Mini should turn off automatically once the descaling process is complete and you’ve run a few cleansing brews with fresh water. If the light remains on, it might indicate that the process isn’t finished. Ensure you’ve followed all the descaling steps correctly, including the rinsing cycle with fresh water, to turn off the descale light.
Does the Keurig Mini have a removable reservoir?
No, the Keurig Mini does not have a removable water reservoir. The water reservoir is fixed to the machine, so you’ll need to fill it directly from the tap or a water pitcher.
How to remove the water reservoir from Keurig Mini?
The Keurig Mini’s water reservoir is not removable. It is a fixed part of the machine and cannot be taken off for cleaning or filling.
How do you take apart a K Mini?
Taking apart a Keurig K Mini is not recommended for regular maintenance. These machines are designed to be compact and user-friendly without the need for disassembly. Any disassembly may void warranties or risk damaging the brewer. If you encounter issues with your K Mini, refer to the user manual for troubleshooting or contact Keurig customer support.
How to clean Keurig single-serve K-Mini needle?
To unclog the Keurig K-Mini’s needle, carefully detach the K-Cup holder and use a soft brush or paperclip to clear any clogs or debris from the needle. Afterward, reattach the K-Cup holder.
How do I clean the filter on my Keurig Mini?
The Keurig Mini does not have a traditional water filter that requires cleaning. If you are concerned about water quality, consider using pre-filtered or bottled water when filling the reservoir.
Last Words
To sum it up, this guide on how to descale Keurig Mini has walked you through the essential steps to maintain your coffee maker’s performance. Whether you use Keurig’s descaling solution or white vinegar, these techniques will keep your Keurig Mini in top-notch condition, ensuring a flavorful cup of coffee with each brew. Enjoy your freshly descaled Keurig Mini!
💡 More Descaling guides on Different Keurig Modes:
👉 How to descale keurig slim?
👉 How to descale keurig slim with vinegar?
👉 How to descale keurig duo?
👉 How to descale keurig supreme (plus)?
👉 How to descale keurig supreme (plus) with vinegar?
👉 How to descale keurig express & K-iced?
👉 How to descale keurig elite?
👉 Can you descale a keurig with vinegar?


Keurig K-Express Coffee Maker, Single Serve K-Cup Pod Coffee Brewer, Black
11% Off


BLACK+DECKER 12-Cup Digital Coffee Maker, CM1160B, Programmable, Washable Basket Filter, Sneak-A-Cup, Auto Brew, Water Window, Keep Hot Plate, Black
$34.99 (as of July 12, 2024 04:43 GMT +00:00 - More infoProduct prices and availability are accurate as of the date/time indicated and are subject to change. Any price and availability information displayed on [relevant Amazon Site(s), as applicable] at the time of purchase will apply to the purchase of this product.)


Cuisinart Coffee Maker, 14-Cup Glass Carafe, Fully Automatic for Brew Strength Control & 1-4 Cup Setting, Stainless Steel, DCC-3200P1
20% Off


Zulay Kitchen Powerful Milk Frother Wand - Mini Milk Frother Handheld Stainless Steel - Battery Operated Drink Mixer for Coffee, Lattes, Cappuccino, Matcha - Froth Mate Milk Frother Gift - Black
47% Off


DK177 Coffee Mat Coffee Bar Mat Hide Stain Absorbent Drying Mat with Waterproof Rubber Backing Fit Under Coffee Maker Coffee Machine Coffee Pot Espresso Machine Coffee Bar Accessories-19"x12"
50% Off