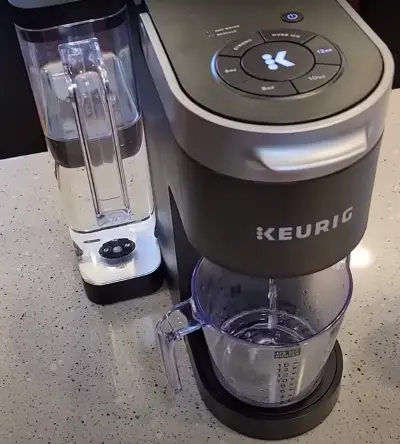
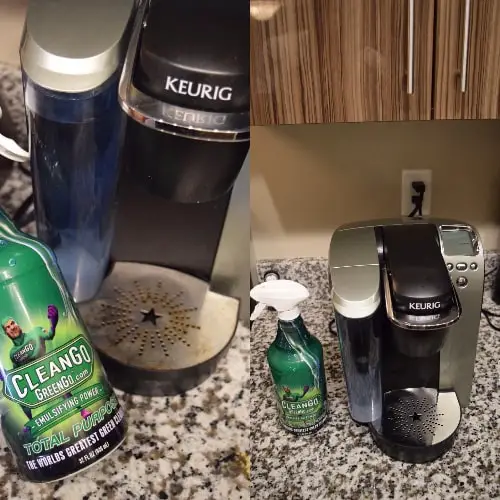
Keurig coffee makers have become a beloved kitchen companion for many coffee enthusiasts. Their convenience and the ability to brew a quick cup of coffee are hard to beat. However, like any kitchen appliance, Keurig machines require regular cleaning and maintenance to function at their best.
In this post, we’ll delve into the importance of cleaning your Keurig regularly and provide insights into how often you should clean it to keep your coffee tasting its finest.
Why Cleaning Your Keurig Matters?
Your Keurig coffee maker is a workhorse, faithfully brewing cup after cup. But over time, it can accumulate coffee residues, mineral deposits, and even mold if not properly maintained. Here’s why keeping your Keurig clean is crucial:
- Machine Performance: A clean Keurig operates more efficiently. When coffee residues build up, they can clog the machine’s internal components, causing it to slow down or malfunction.
- Taste Matters: Coffee is all about flavor, and a dirty Keurig can affect the taste of your brew. Residues and scale can alter the coffee’s flavor profile, making it taste bitter or off-putting.
- Hygiene Concerns: Neglecting cleaning can lead to the growth of mold or bacteria in the water reservoir and internal components. This poses potential health risks and can impact the quality of your coffee.
- Longevity: Regular cleaning extends the lifespan of your Keurig. A well-maintained machine is less likely to develop issues or require costly repairs.

A Clean Start Every Day: Daily Cleaning Routine
Now that we’ve established why regular cleaning is essential let’s dive into a daily cleaning routine to keep your Keurig in top shape. These quick and straightforward tasks can become a part of your morning coffee ritual:
- Empty the Drip Tray: The drip tray beneath your Keurig collects excess liquid from brewing and any spills. To prevent mold growth and coffee buildup, remove and empty the drip tray daily. Rinse it with warm, soapy water, and let it air dry before reinserting it.
- Discard Used K-Cups: After brewing your morning coffee, promptly remove and discard the used K-Cup. Leaving used K-Cups in the machine can lead to mold and coffee residue buildup. Additionally, make sure the K-Cup holder is empty and clean.
- Wipe Down the Exterior: Take a moment to wipe down the exterior of your Keurig with a damp cloth. This helps prevent dust and grime from accumulating on the surface, keeping your machine looking clean and inviting.
- Check the Water Reservoir: If you have a removable water reservoir, give it a quick check to ensure it’s clean and free from any residue. Rinse it with warm water and let it air dry if needed.
- Inspect the Drip Nozzle: Lift the drip nozzle to inspect it for any coffee buildup. If you notice residues, wipe them away with a clean, damp cloth or a coffee filter.
By incorporating these daily cleaning tasks into your coffee routine, you’ll maintain a clean and hygienic Keurig. It only takes a few minutes, but the impact on your machine’s performance and the taste of your coffee is well worth the effort. Plus, starting your day with a clean coffee maker sets the stage for a delightful coffee experience.
Keeping It Fresh: Weekly Cleaning Checklist
Let’s delve into a more detailed weekly cleaning checklist to ensure your Keurig stays in top-notch condition. These weekly tasks go a step further in preventing the buildup of coffee residues and scale:
- Clean the Water Reservoir: Remove the water reservoir and give it a thorough cleaning. Wash it with warm, soapy water, rinse well, and let it air dry. Check for any mineral deposits that may have formed on the inside; if you spot any, gently scrub them away with a brush or a mixture of equal parts water and descaling solution.
- Deep Clean the K-Cup Holder: The K-Cup holder can accumulate coffee grounds over time. Remove it and disassemble any removable parts. Wash them in warm, soapy water, and make sure to clean the puncture needle, which can become clogged. Let all parts dry completely before reassembling.
- External Cleaning: Pay attention to the external parts of your Keurig. Wipe down the entire exterior, including buttons and the display screen, with a damp cloth. For stubborn spots or dried coffee splatters, you can use a mixture of mild detergent and water. Always ensure that the machine is unplugged during this process.
- Descaling: Depending on your water quality and usage, you may need to descale your Keurig on a weekly or bi-weekly basis. Refer to your Keurig’s manual for specific descaling instructions. Generally, this involves running a descaling solution or white vinegar through the machine to remove mineral deposits.
- Inspect the Drip Nozzle: Lift the drip nozzle and thoroughly clean it. Check for any stubborn coffee residues or scale buildup, and use a damp cloth or coffee filter to wipe them away.
By completing these weekly cleaning tasks, you’ll prevent the accumulation of coffee residues, scale, and other contaminants that can affect the taste of your coffee and the performance of your Keurig. A little extra effort goes a long way in ensuring that your daily brews are consistently delicious and satisfying.
Maintaining Peak Performance: Monthly Deep Cleaning

While daily and weekly cleaning routines help keep your Keurig in good shape, a monthly deep cleaning is essential to ensure it continues to perform at its best. This more comprehensive cleaning routine is especially important for preventing the buildup of mineral deposits and coffee residues that can affect both the taste of your coffee and the longevity of your machine.
Here’s a step-by-step guide to performing a monthly deep cleaning for your Keurig:
1. Descaling Your Keurig: Depending on your water quality and usage, descaling may be required monthly or every few months. Follow these steps to descale your Keurig:
- Prepare a mixture of descaling solution and water or use white vinegar. Consult your Keurig’s manual for specific measurements and instructions.
- Empty the water reservoir and fill it with the descaling solution.
- Run the brew cycle without a K-Cup to ensure the solution flows through the internal components.
- Once the cycle is complete, discard the solution.
- Rinse the water reservoir thoroughly and fill it with fresh water.
- Run multiple brew cycles with plain water to remove any residual descaling solution.
2. Clean Internal Components: It’s essential to clean the internal components of your Keurig, as coffee residues and scale can accumulate there over time. Here’s how to do it:
- Unplug your Keurig and let it cool down.
- Remove the water reservoir and any removable parts, such as the drip tray and K-Cup holder.
- Wash these parts in warm, soapy water, and dry them thoroughly.
- To clean the internal components, use a soft, damp cloth or a coffee filter to wipe away any coffee residues or scale buildup.
- Pay special attention to the puncture needle and the drip nozzle, as these areas can get clogged.
3. Check and Replace Water Filter: If your Keurig has a water filter, check its condition and replace it if needed. Follow the manufacturer’s guidelines regarding the replacement frequency, as water filters typically need changing every two months or after a specific number of brews.
4. Exterior Cleaning: Don’t forget to clean the external parts of your Keurig. Wipe down the entire exterior with a damp cloth, paying attention to buttons, the display screen, and any nooks and crannies where coffee residues might hide.
Performing this monthly deep cleaning routine will help ensure that your Keurig remains in excellent condition, delivering consistently delicious coffee with every brew. Additionally, it will extend the lifespan of your machine, allowing you to enjoy its convenience for years to come.
Signs That Keurig Needs Cleaning
We’ve discussed a general cleaning frequency, but the frequency of cleaning may vary from one user to another. If you’re an avid coffee drinker or live in an area with hard water, you might need to clean your Keurig more often.
So, how do you know when it’s time to get your hands dirty and start cleaning? Here are some common signs that your reliable coffee maker might be in need of some maintenance:
1. Slow Brewing: If your Keurig starts taking longer than usual to brew a cup of coffee, it’s a clear indication that something might be amiss. It could be due to clogs caused by coffee residues or scale buildup in the internal components.
2. Reduced Coffee Quality: Are you noticing that the coffee from your Keurig doesn’t taste as good as it used to? This can happen when the machine’s internal parts are coated with coffee oils and residues, affecting the flavor of your brew.
3. Coffee Grounds in Your Cup: Finding coffee grounds in your coffee cup is a definite red flag. It suggests that the K-Cup holder or puncture needle is clogged, preventing the proper flow of water through the coffee grounds.
4. Error Messages: Some Keurig models come equipped with error messages or indicator lights. If you see one of these warnings, it’s a clear sign that your Keurig requires attention. Error messages often indicate issues like a clogged needle or water pump.
5. Strange Noises: Unusual noises during the brewing process, such as loud grinding or rattling sounds, can signal that something is obstructing the internal components.
Wrapping Up
Maintaining your Keurig coffee maker through regular cleaning is an investment in both the quality of your coffee and the longevity of your machine. By following a consistent cleaning routine, you ensure that every cup of coffee brewed is as delicious as the first, and you extend the life of your trusty Keurig companion.
So, don’t procrastinate on cleaning your Keurig! Whether it’s daily, weekly, or monthly tasks, make them a habit. Your taste buds will thank you for the fresh, untainted flavors, and your coffee maker will continue to serve you faithfully for years to come.
Remember, a clean Keurig is a happy Keurig!
💡Check Descaling guides on Different Keurig Modes:
👉 How to descale keurig slim?
👉 How to descale keurig slim with vinegar?
👉 How to descale keurig mini?
👉 How to descale keurig duo?
👉 How to descale keurig supreme?
👉 How to descale keurig supreme with vinegar?
👉 How to descale keurig express?
👉 Can you descale a keurig with vinegar?
👉 How to descale keurig elite?


